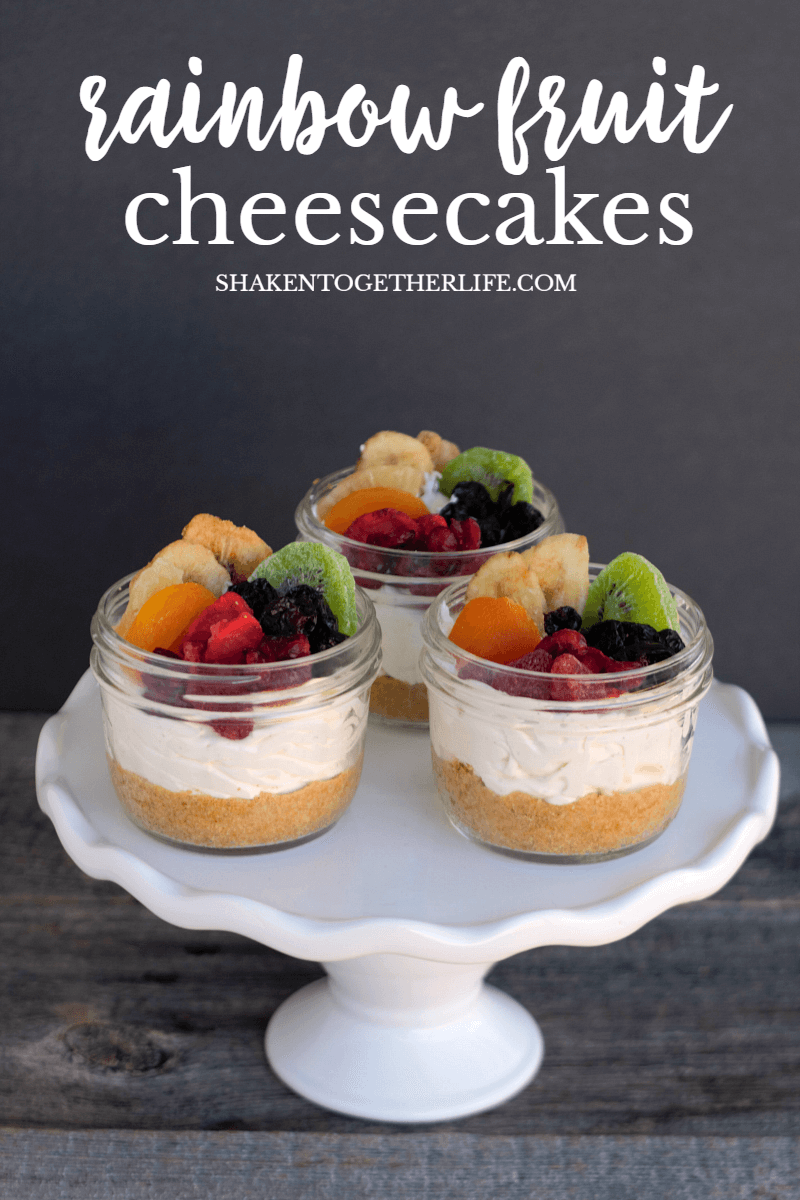
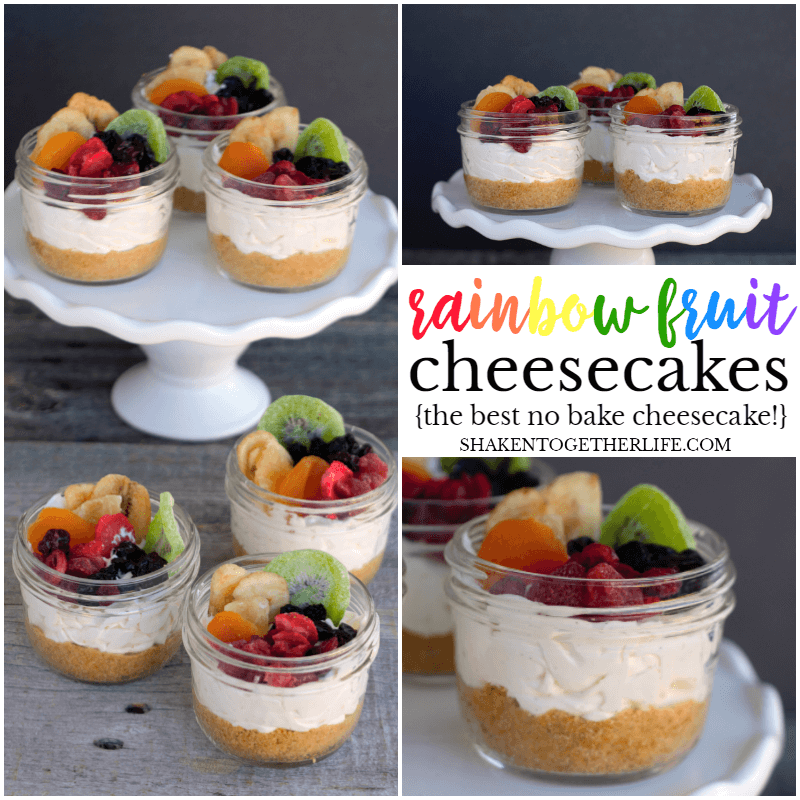
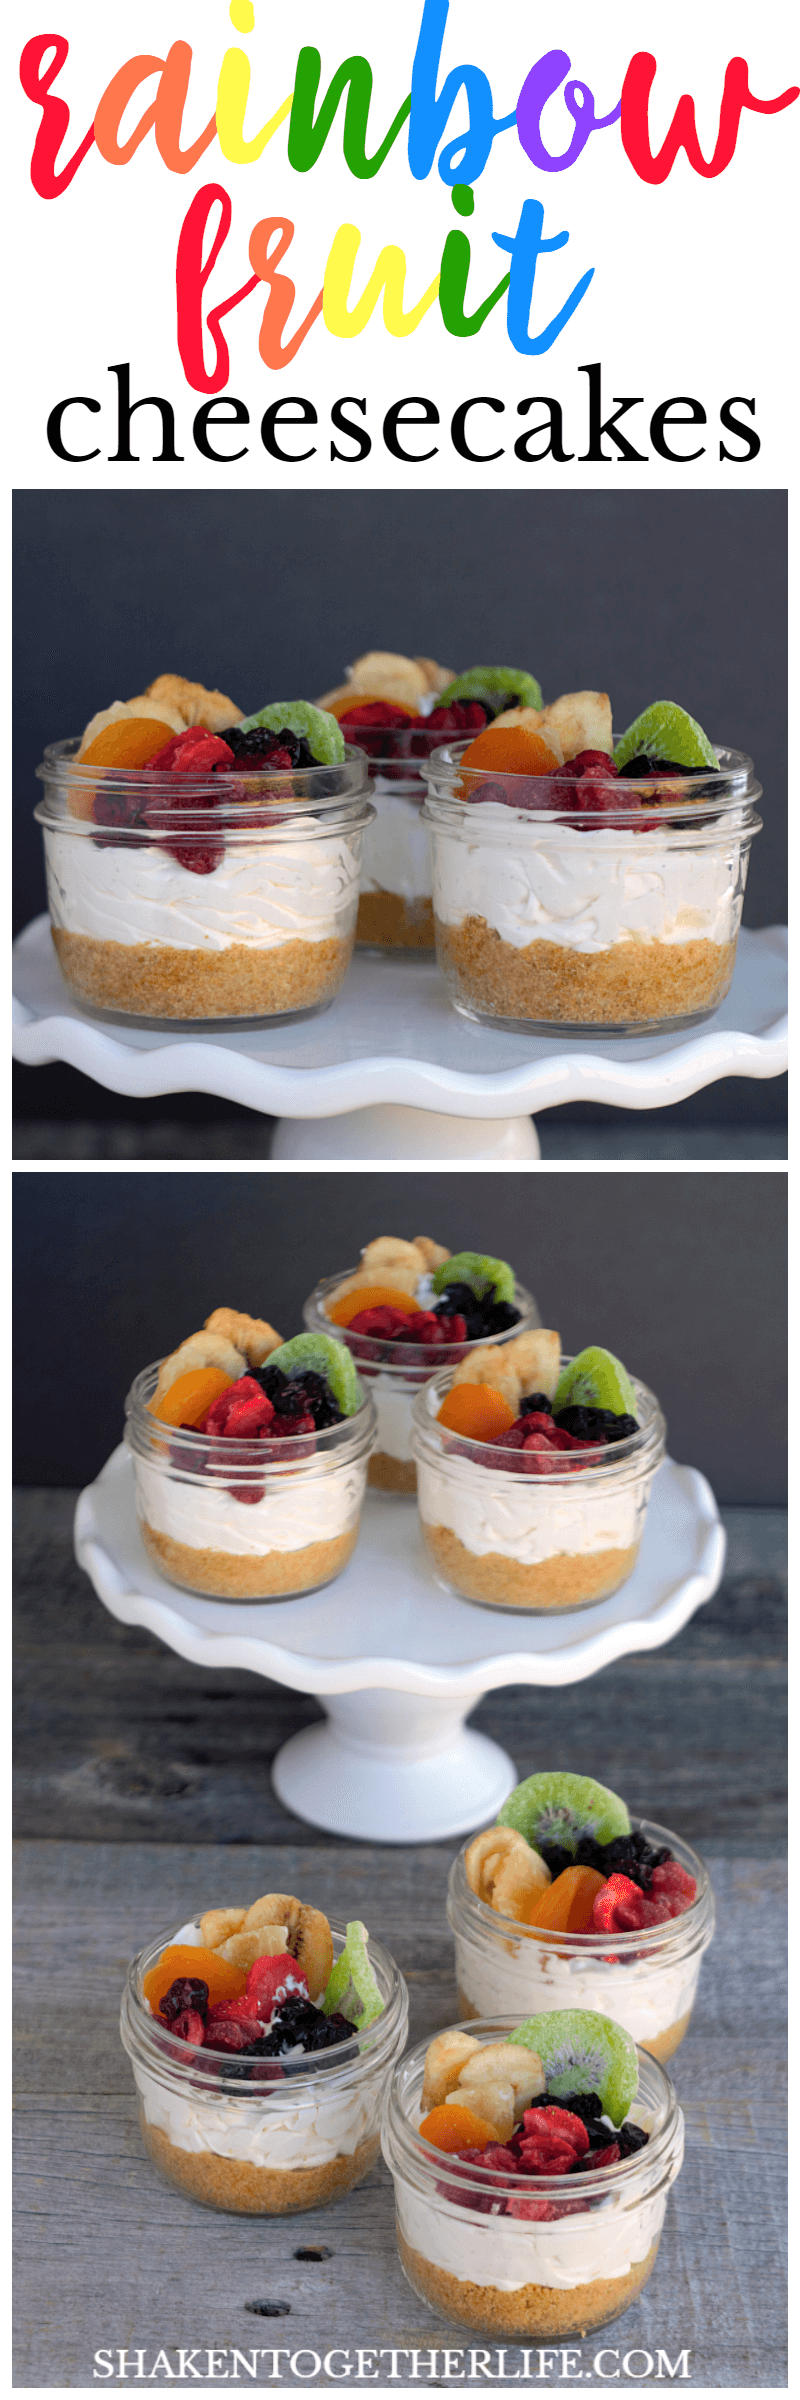
Rainbow Fruit Cheesecakes in a Jar
This post may contain affiliate links. See our Privacy Policy for details.
Rainbow Fruit Cheesecakes in a Jar are just the prettiest little desserts! My favorite no bake cheesecake recipe is perfectly complimented with a homemade graham cracker crust and a rainbow of colorful dried fruit!
Want to save this recipe?
Enter your email & I'll send it to your inbox. Plus, get great new recipes from me every week!
They say you eat with your eyes first, right? If that is true, then I’m really sorry but I’ve just eaten all of these gorgeous fruit topped cheesecakes in a jar. Sorry, not sorry 😉 No worries though. They are so easy to whip up that I’ll have another batch ready in no time … you bring the stretchy pants, ok?
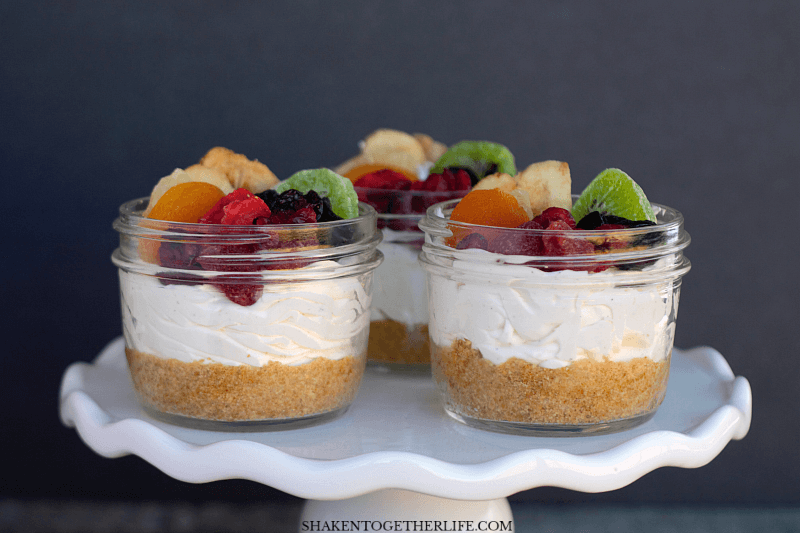
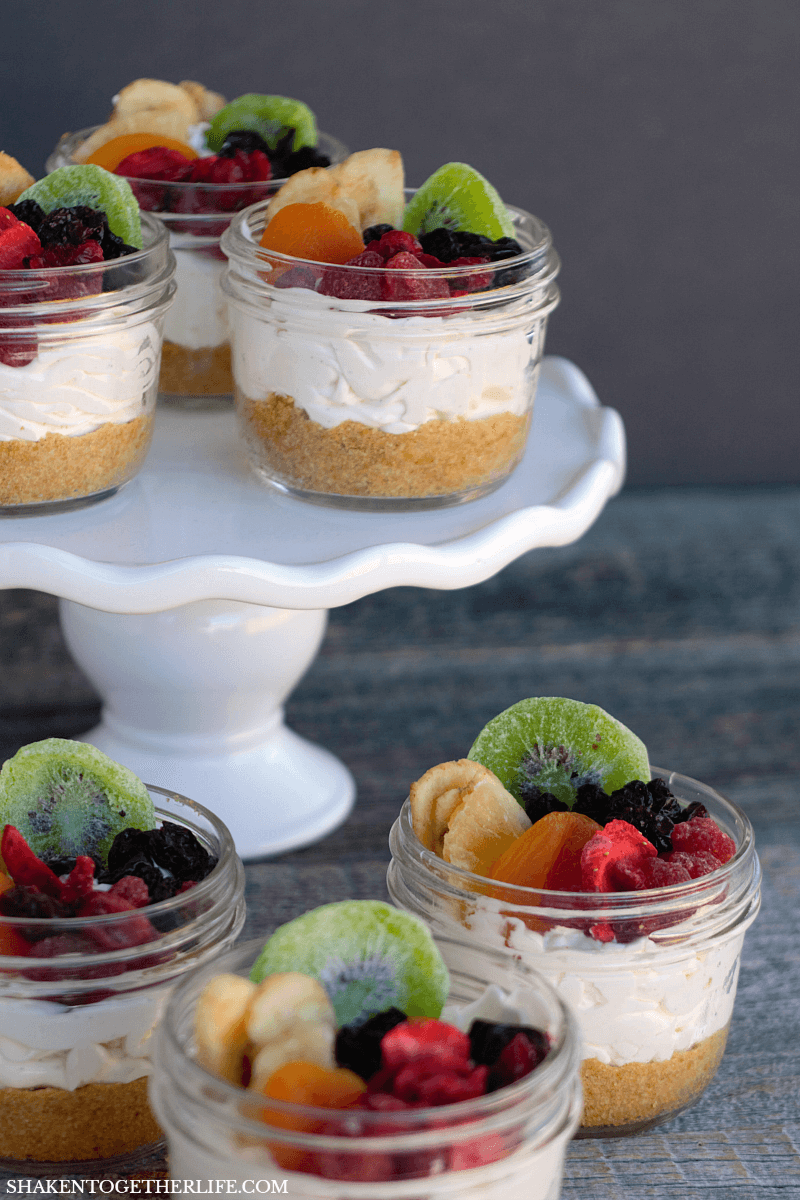
Rainbow Fruit Cheesecakes in a Jar
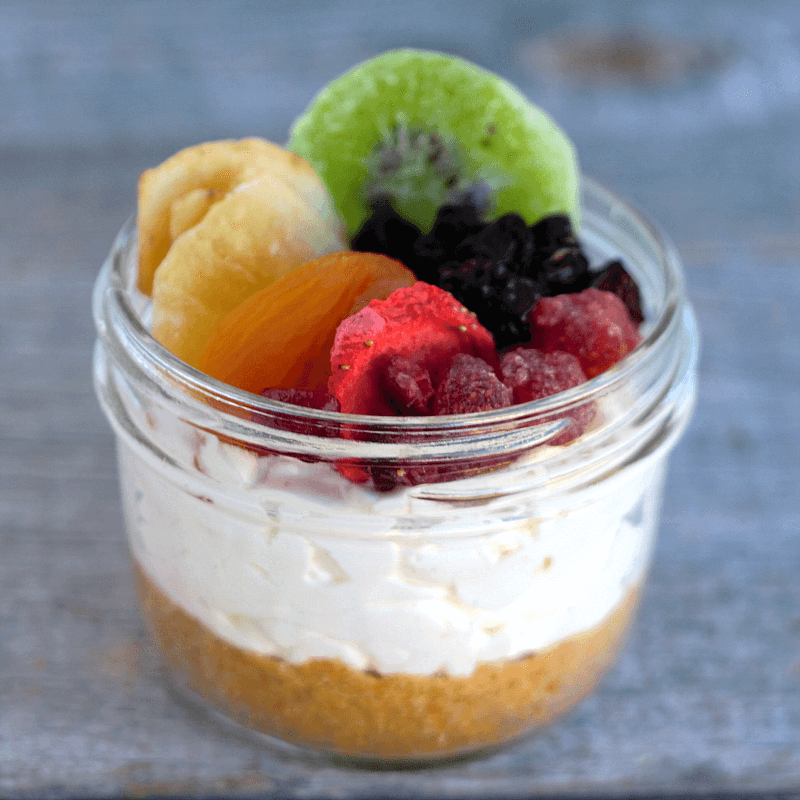
I could look at these pretty little things all day. There is the crunchy khaki crust, soft creamy white filling and then an EXPLOSION of colorful fruit piled on top!
Speaking of fruit, I used a variety of dried and freeze dried fruits. I hit up my local bulk food store but I’ve seen a pretty good selection of dried fruits at my local grocery store, Target, Walmart and ALDI. And of course, you will hit the mother lode of dried fruit on Amazon. (aff link) You can use fresh fruit if you so choose, but since I’m a no-fuss food kind of girl, I was perfectly happy with no chopping, dicing, peeling or seeding to do.
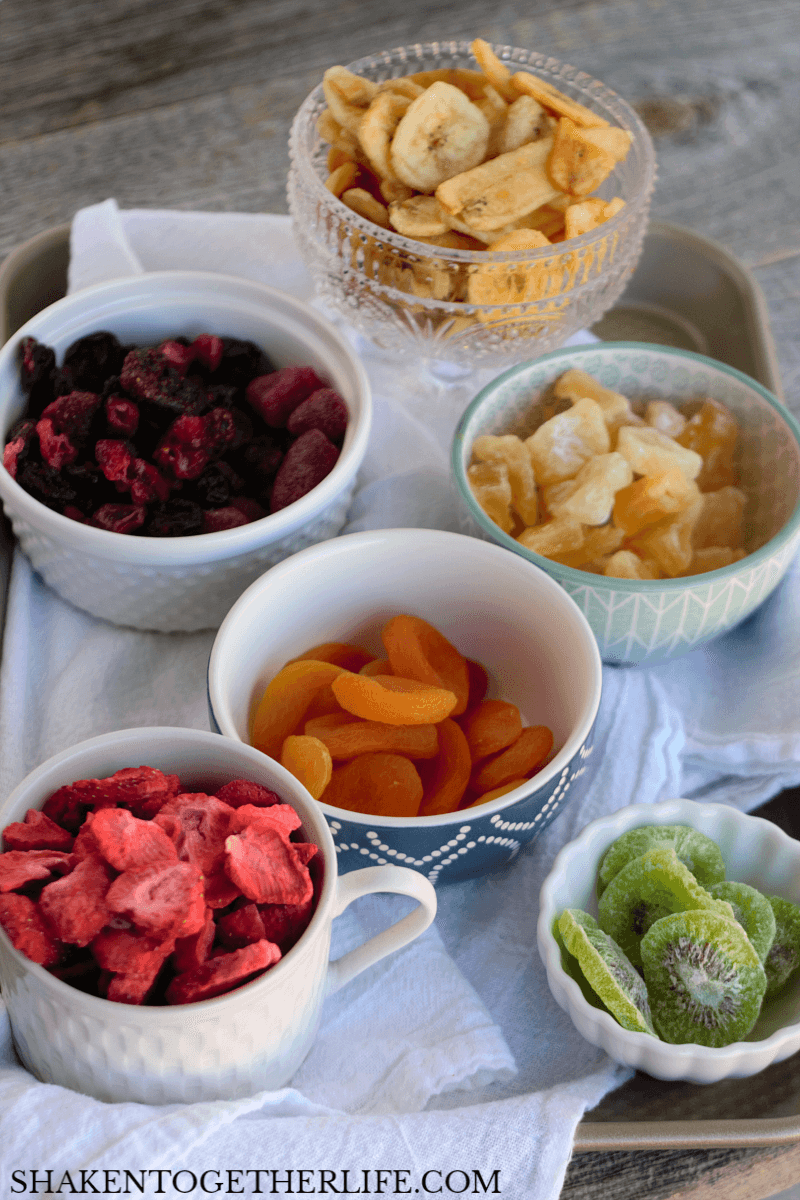
The rainbow fruit I used to top these cheesecakes is below:
- Red: Freeze dried strawberry slices and mixed dried red berries (strawberries, goji berries, raspberries, tart cherries)
- Orange: Dried apricots (You could also use papaya, mango, cantelope or oranges.)
- Yellow: Banana Chips and dried pineapple chunks (Dried apples or apple chips would work, too.)
- Green: Dried/sugared kiwi slices (I’ve also seen dried honeydew melon chunks.)
- Blue: Dried blueberries
- Purple: Raisins (You could use prunes.)
Once you have all that colorful fruit, pile it around on top of each cheesecake in ROYGBIV order.
This recipes makes 6 generous Rainbow Fruit Cheesecakes in a Jar. I used these Kerr half pint mason jars because I love the smooth sides (the better to see all those lovely layers) and the wide mouth. (These are the same jars I used for these Berry Sweet Mason Jar Valentines.)
If you want 12 servings or just smaller portions, use 4 oz. mason jars and divide the crust and filling accordingly.
If you liked this recipe, you’ll love my free 5-Ingredient Dinner Challenge.
I’ll send you super simple meals that use just five ingredients and come together fast — perfect for busy weeknights when you don’t want to overthink dinner.

Rainbow Fruit Cheesecakes in a Jar
Description
Rainbow Fruit Cheesecakes in a Jar are such a pretty no bake dessert! My favorite creamy no bake cheesecake filling recipe is piped on top of a homemade graham cracker crust and topped with colorful dried fruit!
Ingredients
No Bake Cheesecake Filling
- 8 oz. softened cream cheese
- 1/2 cup granulated sugar
- 1 – 1 1/2 teaspoons vanilla extract
- 8 oz. whipped topping (thawed)
- 3 tablespoons heavy cream or whole milk
Homemade Graham Cracker Crust
- 1 1/3 cups graham cracker crumbs
- 1 stick (1/2 cup melted butter)
- 1/4 cup granulated sugar
Rainbow Fruit Topping
- Variety of dried and/or freeze dried fruits
Instructions
Prepare the Graham Cracker Crust
- In a bowl, stir together the graham cracker crumbs, sugar and melted butter.
- Divide mixture between six half pint wide mouth mason jars.
- With a tart press or the back of a spoon, pretty the crust down into a smooth even layer.
- Refrigerate crust for at least an hour.
Mix up the No Bake Cheesecake Filling
- In a large bowl, cream together softened cream cheese, sugar, cream/milk and vanilla extract. Make sure the filling is smooth and cream cheese is totally incorporated.
- Gently fold in whipped topping until fully incorporated.
- Pipe or spoon filling on top of graham cracker crust.
- Prior to serving, arrange dried fruit on top of the cheesecake filling in rainbow order.
My favorite way to eat these Rainbow Fruit Cheesecakes in a Jar is to dip the large pieces of fruit in that creamy cheesecake filling, then grab a spoon and dig in right to the bottom of that crunchy graham cracker crust. Eat, enjoy and repeat!!
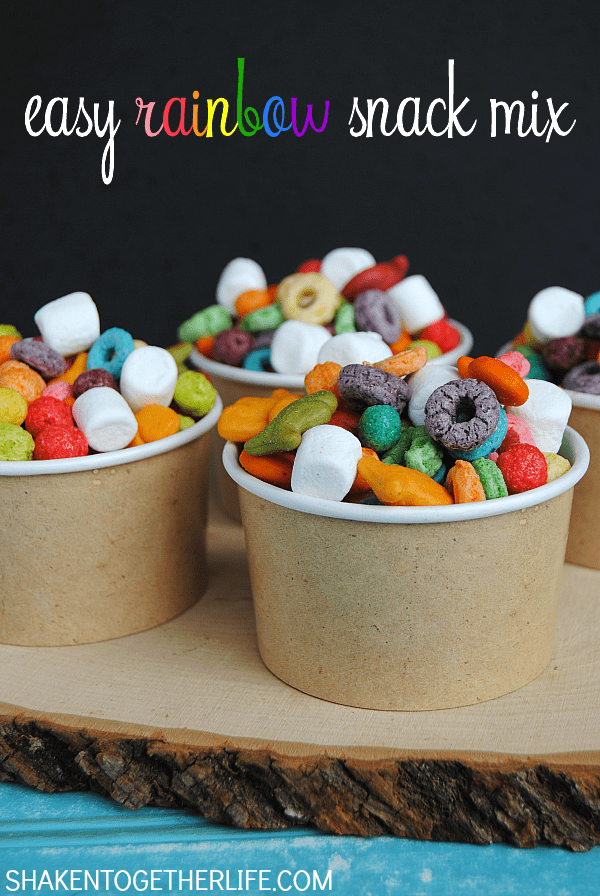
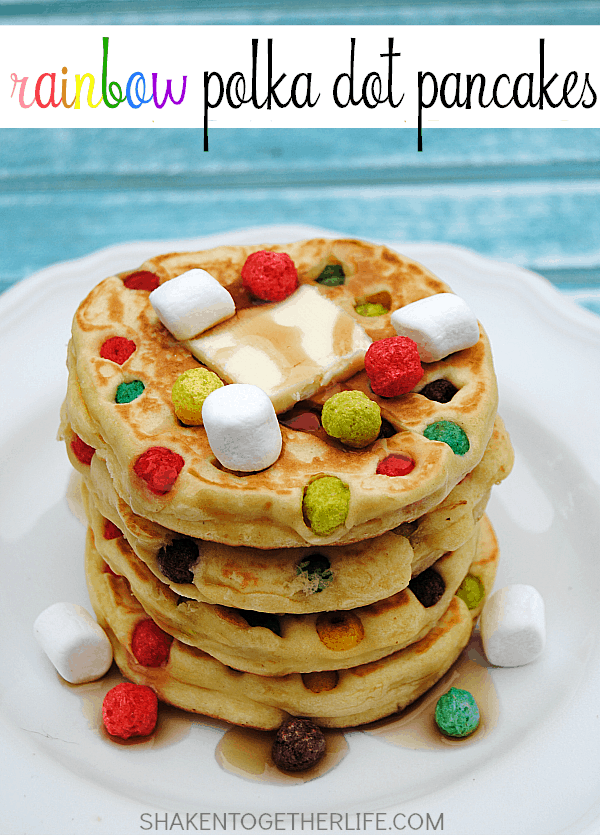
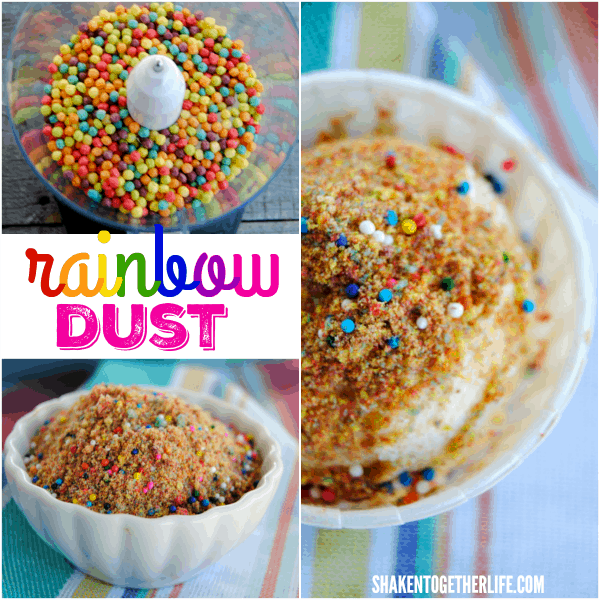
More Fun Rainbow Food!
These look SO GOOD! Thanks for linkin’ up with What’s Cookin’ Wednesday!